Table of Contents
*This post may contain affiliate links. As an Amazon Associate we earn from qualifying purchases.
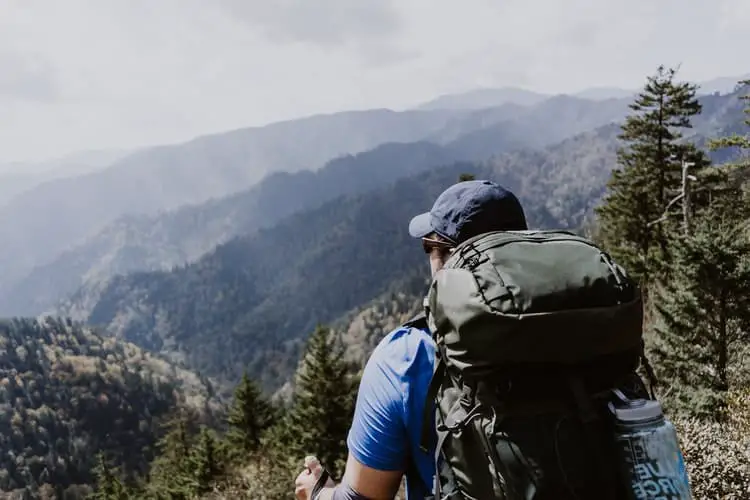
Meta: Going for a trip in the outdoors and struggling to pack your backpack? This article tells you everything you need to know about the best packing strategies!
Knowing what to bring and how to pack a hiking backpack is an essential skill for any hiker. If you’re planning a hiking trip soon and need some advice, this guide has everything you need to know for how to pack your hiking backpack.
What to Take
Depending on the length and location of your backpacking trip, this may look very different. However, the vast majority of new and intermediate backpackers overpack their bags to some degree when preparing for a journey.
If you don’t carefully pay attention to your packing list, you risk ending up lugging unused gear around on your back all day. This isn’t only uncomfortable; it can also be dangerous and can lead to back or joint problems.
A common trick among backpackers is to separate your gear into two different categories: essentials and luxuries. It’s important not to put non-necessary items into the “essential” category. As badly as you may need caffeine in the morning, your deluxe French press machine doesn’t qualify as an essential.
Once you have your essentials — sleeping gear, food, basic clothing and tools — sorted out of the pile, take a look at your luxuries and try to cut out half of the items. You may be able to keep a little more than half depending on how much space you need to create in your pack, but you should still follow the general principle. Eliminate excesses, whether it’s removing one of your five books or leaving an extra coat home.
It’s also worth keeping in mind that just because you own a large backpack doesn’t mean you need to fill it up all the way. For many shorter hikes, your backpack may be able to comfortably carry more stuff than you’ll actually need. Resist the urge to add more; your body will thank you for it when you’re out on the trail.
Packing Checklist
- Clothes
- Sleeping Gear
- Camping Equipment
- Small, lightweight luxuries
Backpack Sections
If you’ve sorted out your packing list and feel confident you can carry everything you have remaining, it’s time to divide your backpack into sections. This doesn’t mean you need to put barriers in different parts of your pack to keep everything segregated — just aim to separate your items by general category and find where they might fit best in your pack.
Bottom of Backpack
The very bottom of your backpack should be filled with things you won’t need at all during the day. In other words, this means your sleeping gear and other things you won’t take out until you make camp in the evening. Your sleeping bag, sleeping pad (if it fits) and camp shoes should go in this section, along with any layers (like long underwear) you don’t plan to wear until going to sleep.
Packing these softer items towards the bottom of your pack creates a sort of shock barrier when you rest your pack down on hard surfaces. The squishy materials also offer plenty of space for you to stash items in nooks and crannies. Before putting your sleeping bag at the bottom of your pack, make sure to cover it in a dry bag! A wet, filthy sleeping bag is the easiest way to ruin a camping trip.
You should also take care not to stuff the very bottom of your backpack with items that are too heavy. Overloading the lowest section of your backpack can cause your gear to sag towards the ground and place extra stress on your shoulders. Compensating by tightening the strap can cut off your circulation, only compounding the problem.
Middle of the Backpack
The core of your backpack is the best place for you to stash heavier items that you won’t need during the course of your hike. Place items like your camp stove and entree dishes here, along with your bear canister for any items that may attract bears. Keeping a canister with you is important, even if you’re not sure whether or not you may encounter any bears. It’s far better to be safe than sorry.
Your pots and pans and extra water supply should also be in this layer. Many people balk at the idea of stashing their food near their stove fuel — make sure to tightly secure your fuel and put it below the food in your pack. If anything does spill, this method will prevent the fuel from contaminating your food. Keeping your sleeping back and essential items enclosed in dry bags can also guard against accidental spill damage.
Make sure to keep the heaviest items in your pack as close to your actual back as possible. Packing them here will keep your load as compact as possible and give you the easiest pack to carry. Putting the heavy items too far down in your pack will add stress to your back (as explained above), while overloading your pack at the top can pull you backwards as you hike and slow you down.
Top of the Backpack
The top of your backpack should be used to carry all the heavier or bulkier items you may need to take out during the course of the day’s hike. An extra jacket is a great thing to stow up here, as well as some accessories like a case for sunglasses or a hat for hot weather. If you’re carrying a first aid kit in your pack, it should also go at the top of your pack (if it’s too heavy, split it up and keep just some simple supplies up top)
It’s generally easier to keep things you’ll need to grab while hiking outside of your backpack itself and in smaller side pockets; this saves you from having to open your entire backpack whenever you want to grab something as simple as a quick bag of trail mix or a couple sips of water.
The top is better used as a sort of go-between for the things you access each day and the stuff you only take out to make camp. While you should ideally be able to get through the day’s hike (or until a regular break) without opening your pack, keeping some essential items up top helps you stay prepared in case of a sudden weather change or an unexpected slip and fall injury.
Take extra care not to overload the top of your backpack, lest you risk top-loading your pack and raising the center of gravity. This can cause your pack to tug at your shoulders and make your hike much more difficult.
Brain
Many backpacks feature an additional piece of storage space at the top. Aptly termed the “brain,” this pouch usually sits on top of the main pack body and is fastened on with straps and buckles. It’s a great way to store some trail essentials, and it’s far more convenient than opening and repacking your entire backpack for each new stop.
What you decide to keep in the brain of your pack may vary depending on size and on the amount of stuff you bring to a hike. More likely than not, there will be some overlap between the items in the top of your pack and those that make it to the brain. When picking which to put in the brain and which to leave below, think of the things you’re most likely to need while you’re out hiking and put those up in the brain.
Items you may only need in the event of a weather change, like a jacket or poncho and your tent body, are best left in the main compartment of your backpack. If you want, you can split some of your first-aid kit into the brain of your backpack for more convenient access; in all likelihood, most minor injuries should allow you plenty of time to grab a first-aid kit from the main storage area.
Additional Pockets
Any serious hiking backpack will also contain additional minor flaps and pockets beyond the main ones we’ve discussed so far. These are where you should put all the things you’ll want to grab while you’re walking without needing to stop. Depending on your own preferences, these items may include protein bars, trail mix or other snacks, and a bottle of water.
Your backpack’s hip belt pockets are the ideal place to store some snacks for quick and clean access. Most backpacks have a large side elastic holder for a water bottle, which should fit whatever size you decide to bring.
These additional pockets are also where you should store some lightweight necessities. Weather protection items, like sunscreen, sunglasses, and maybe a small bandana to protect you from sun exposure are great things to put here.
Depending on where you’re hiking, it may also be smart to carry some form of identification with you. As you get further from your home (especially in foreign countries) and progress into less hospitable hiking territory, you should make it a habit to always have an ID on your person. You never know when it might come in handy.
Loops and Straps
Finally, backpacks often include additional loops and straps designed for attaching long or otherwise oversized items. You can use these to hold trekking poles, spare shoes, or even just a particularly large sleeping pad that won’t fit in your main backpack.
When tying things to the loops and straps, just make sure that you keep all your gear pointed in roughly the same direction as your backpack. For example, don’t clip a trekking pole horizontally across the width of your pack! Not paying attention to orientation can backfire and lead to you hitting every shrub and raised object on either side of the trail as you pass by.
Conclusion
Hiking is a challenging yet enjoyable way to explore the great outdoors. But as entertaining as the prospect of a hike might sound, it’s still essential to take the time to prepare and pack properly. Spending a bit of extra time packing your hiking backpack can pay massive dividends when you’re out on the trail.
As you pack your hiking backpack, remember to pack only what you actually need and can carry on your back. Then, pack your sleeping items at the bottom of your bag, the rest of your camp gear towards the middle, and your daily necessities towards the top, in the brain, and in the additional pockets. Packing in this methodical manner will minimize your stress and maximize your available space!
